Creating variable fonts ↩
- Planning the designspace
- Designing the sources
- Making sure all sources are compatible
- Creating the designspace
- Adding glyph substitution rules
- Defining instances
- Generating variable fonts
Planning the designspace
Before we start, it’s a good idea to make a sketch of the designspace we’re going to build:
- How many sources will it contain? Along how many axes?
- Where will the sources be positioned?
- Are there any named instances? Where?
- Will there be any special rules? (for example shape substitutions)
We’ll be using the MutatorSans family as an example. Its designspace contains:
- 4 sources along two axes, width and weight
- 1 glyph substitution rule
- 1 instance named Medium
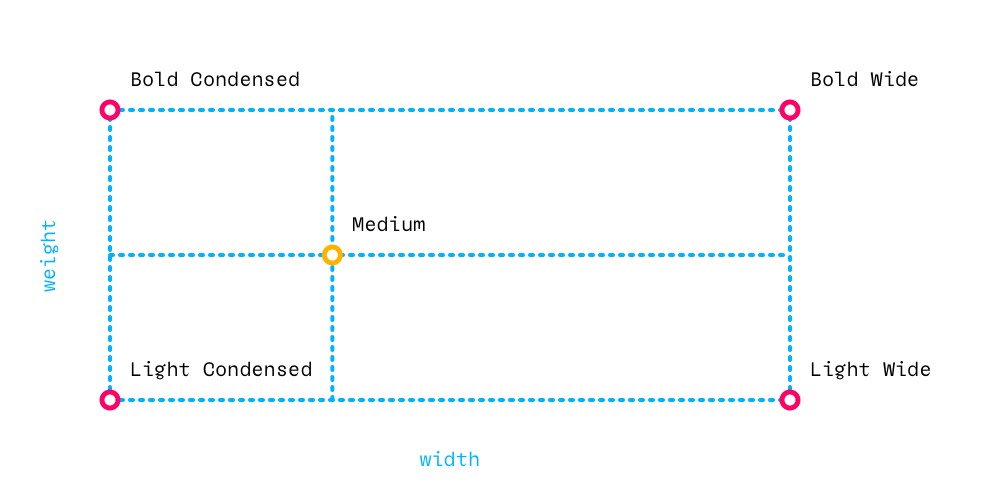
Notice how the interpolation space does not include a Regular source, only extreme styles – this is a design decision. There are other ways to setup a weight/width designspace, give it a try!
Designing the sources
Having a blueprint of the designspace, we can now focus on designing the sources.
These are the 4 sources in MutatorSans, each one stored as a separate UFO font.

It’s also possible to store all sources as layers of a single font. If you choose to work this way, keep in mind that these layers do not have their own kerning.
The usual rules and recommendations about drawing for interpolation apply:
- glyphs must be compatible across all sources (see next section)
- use overlapping paths to have more control over the shapes

It’s usually a good idea to draw the sources and build the designspace iteratively: draw, preview interpolations, adjust the drawings and/or parameters, preview again etc.
Useful tools
- Skateboard
- help users to navigate complex design spaces and to keep outlines under control
- Delorean: Interpolation Preview, Interpolation Slider
- preview interpolation result while drawing
- Overlay UFOs
- view other sources in the background layer
- ShowSparks
- view one-to-one relations between points in all open fonts
- EditThatNextMaster
- easily switch between sources in glyph, space or font windows
- extensions tagged with interpolation in Mechanic 2
Making sure all sources are compatible
Interpolation requires all source fonts to be compatible. This means that:
- all sources must have the same glyphs as the neutral
- in each glyph in all sources, the following must match:
- number of contours
- direction of each contour
- number of on-curve and off-curve points
Older interpolation tools may interpolate a straight segment with a curve by assuming there are off-curve points on top of the on-curves. In variable fonts this is not possible, and it is a good design practice to have all the points in the sources.
Useful tools
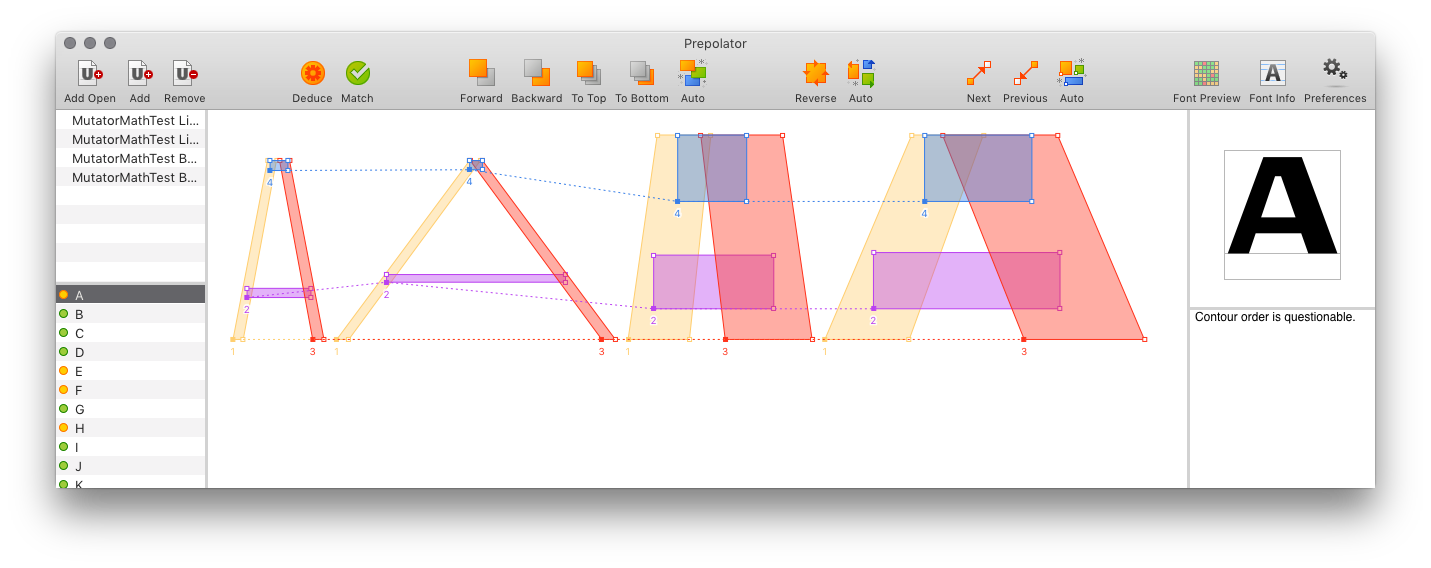
- Prepolator
- an extension to detect and fix compatibility problems between fonts
- Checking interpolation compatibility
- some examples of how to check interpolation compatibility with code
Creating the designspace
The .designspace file is where all information required to build a family of fonts or a variable font is stored.
- each axis is given a name and a range of values
- together, all axes define a coordinate space
- sources are inserted into specific locations of this coordinate space
- instances are defined as new locations with names
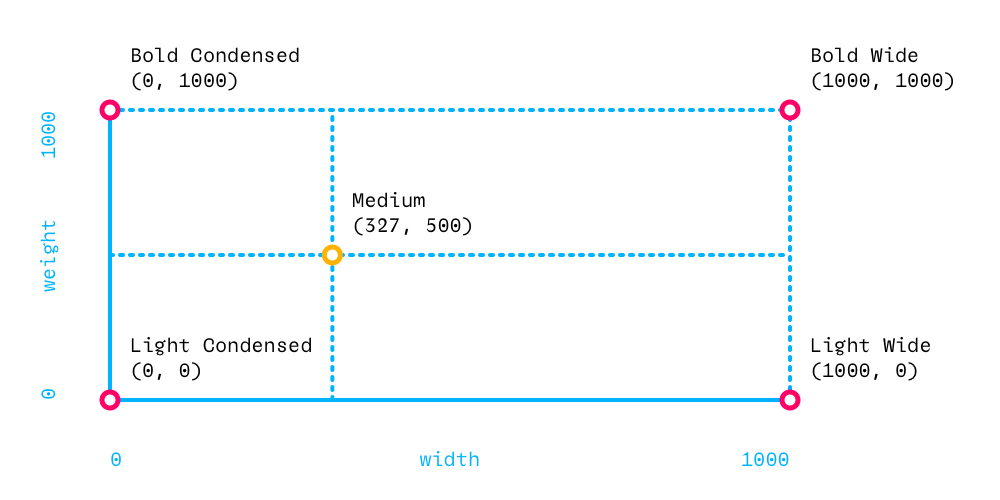
These are the axes and locations in the example MutatorSans designspace:
Useful tools
Different tools can be used to create .designspace files:
- DesignSpaceEditor
- an open-source extension to edit raw designspace data
- DesignSpaceDocument
- a Python library to read & write
.designspacefiles with code
Adding glyph substitution rules
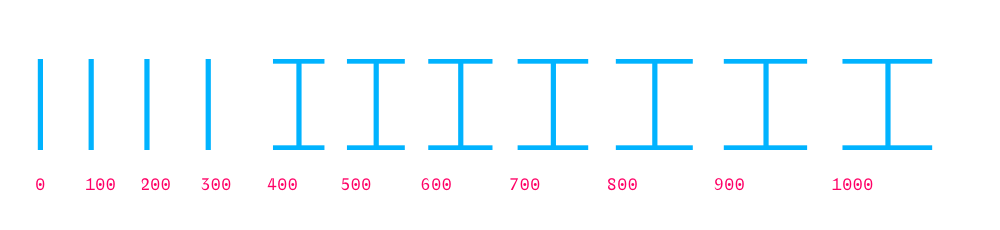
Interpolation produces continuous variation between sources. Glyph substitution rules allow us to introduce local discontinuous changes to areas of the designspace, switching one set of glyph contours for another.
MutatorSans includes a glyph substitution rule to ‘fold’ the serifs of the I if the width parameter is below a certain value:

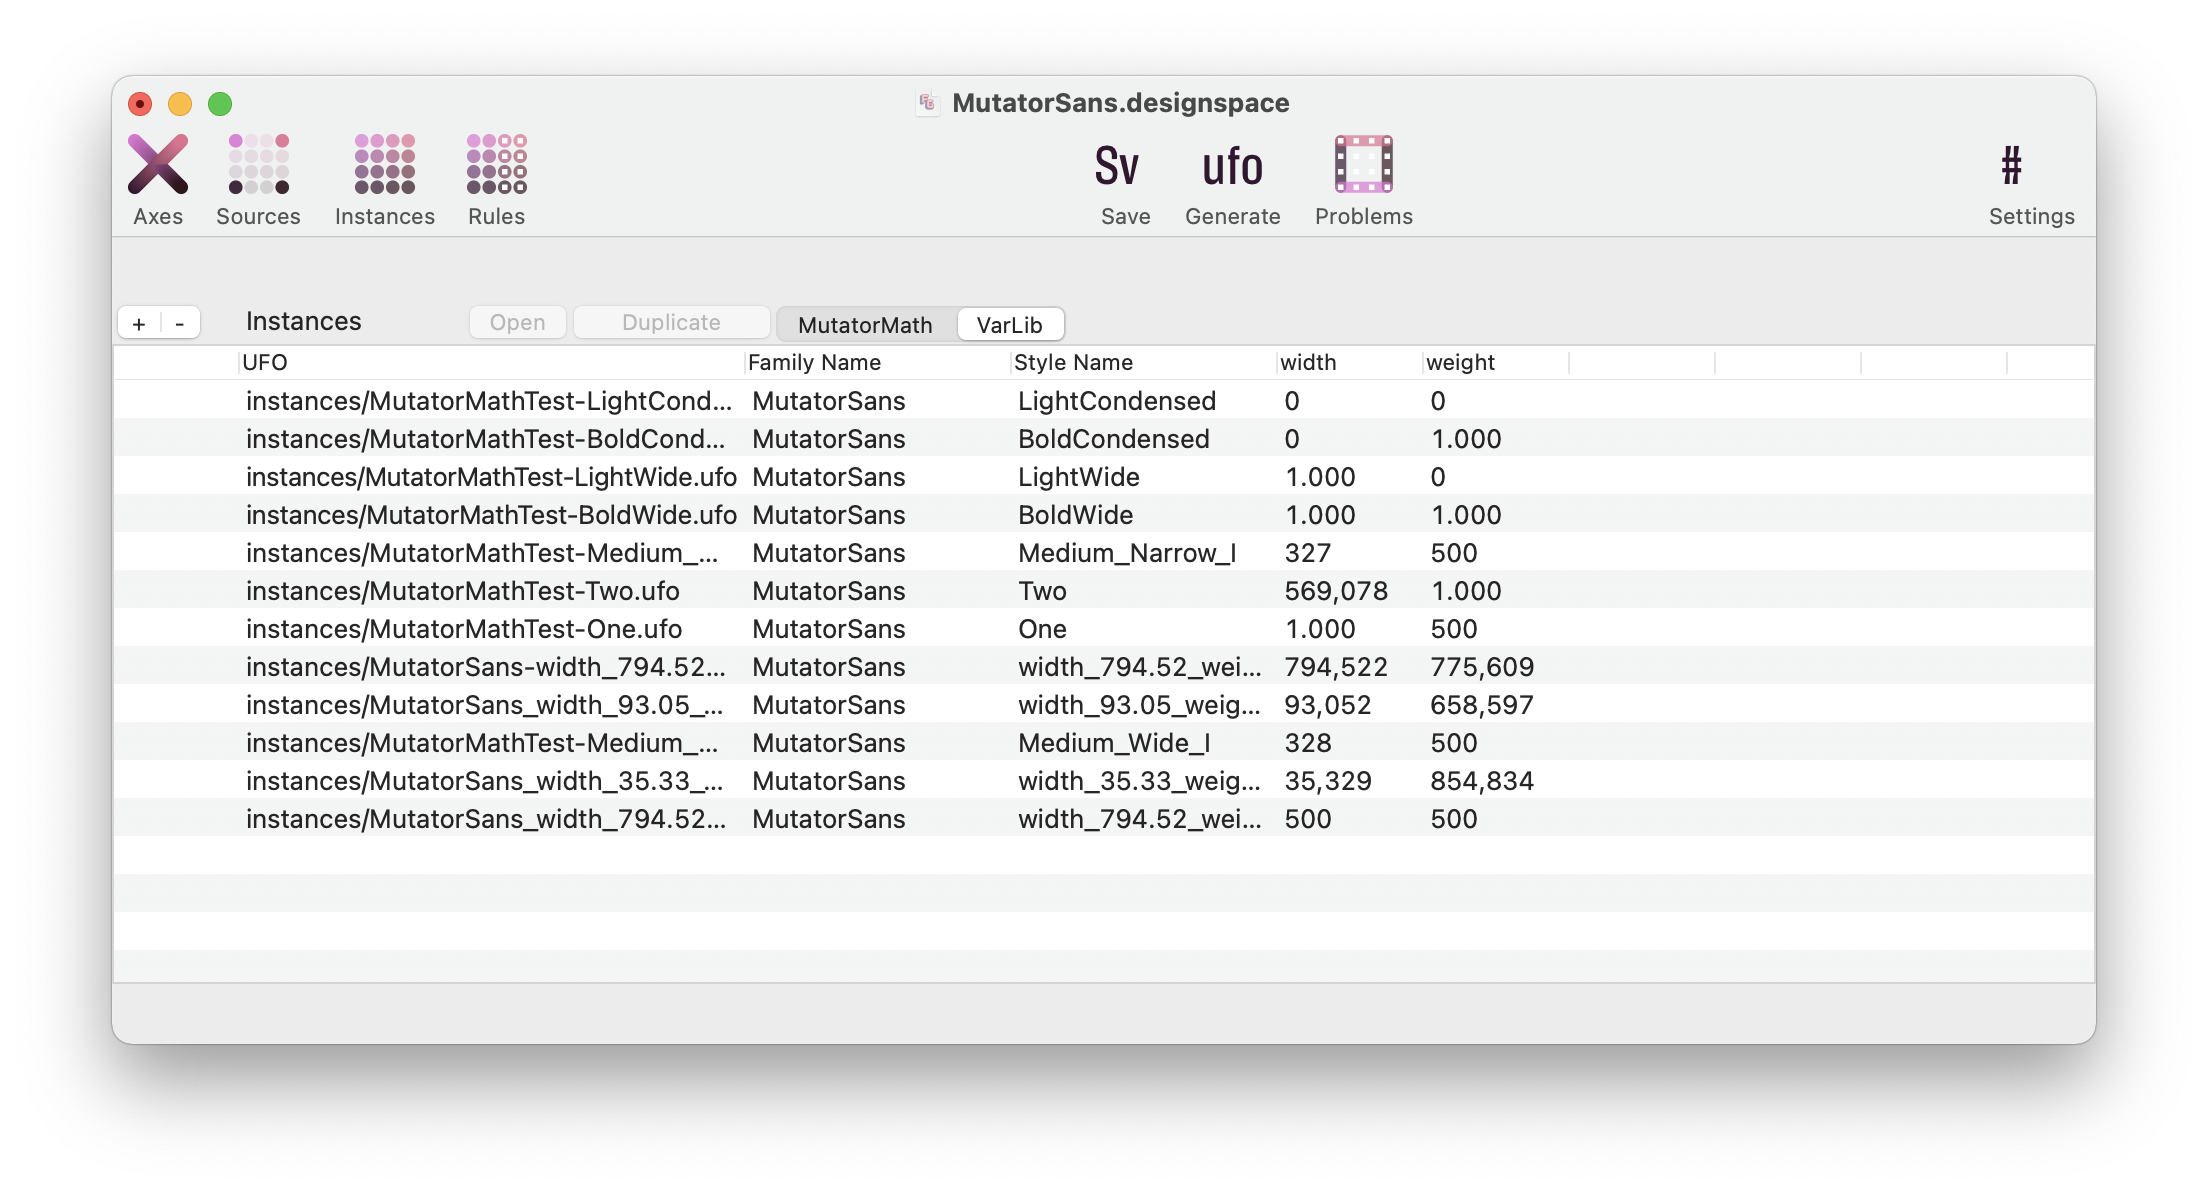
Defining instances
Variable fonts provide a continuous gradient of variations called instances. Instances are designated by a location (for example width=500, weight=250) in the design space, but designers can pre-define some of these variations to have names, like Regular, Bold, or Ultra Wide Thin.
You can set named instances using the DesignSpace Editor extension. Switch to the “Instances” pane, hit + and fill out the new cells in the table:
You can also use the FontTools designspaceLib, check this section of Creating designspace files.
These named instances will be accessible to users in typesetting software. You can list the available named instances of a font using the DrawBot .listNamedInstances() method.
Generating variable fonts
The recommended way of building variable fonts in RoboFont is using the Batch extension. Besides generating static fonts, Batch can also generate a variable font from a .designspace file (and a set of compatible UFO sources).
The Batch extension is open-source and can be installed with Mechanic 2.
The requirements for building variable fonts are stricter than those for building static fonts. Batch does a lot of work behind the scenes to fix compatibility issues between the sources. See the Batch documentation for more details.
Generating variable fonts with the Batch extension
Use the menu File > Batch to open the Batch window:

- drag the
.designspacefile into the list (or use the Open button) - open the section Variable Fonts, and select the desired options
- click on the Generate button to generate the variable font
Generating variable fonts with code
The variable font generator included inside the Batch extension can also be used programmatically: you can import it into your scripts, and use it to generate variable fonts from .designspace files – without opening the Batch window.
The
libfolder of every installed extension is added to thesys.path– so code from one extension can be accessed by another extension or by a script.
The example script below generates a variable font from the MutatorSans .designspace file and linked UFO sources.
import variableFontGenerator

desingSpacePath = 'myMutatorSansFolder/MutatorSans.designspace'
varFontPath = 'myMutatorSansFolder/MutatorSans.ttf'

p = variableFontGenerator.BatchDesignSpaceProcessor(desingSpacePath)
p.generateVariationFont(varFontPath)