Using mark colors ↩
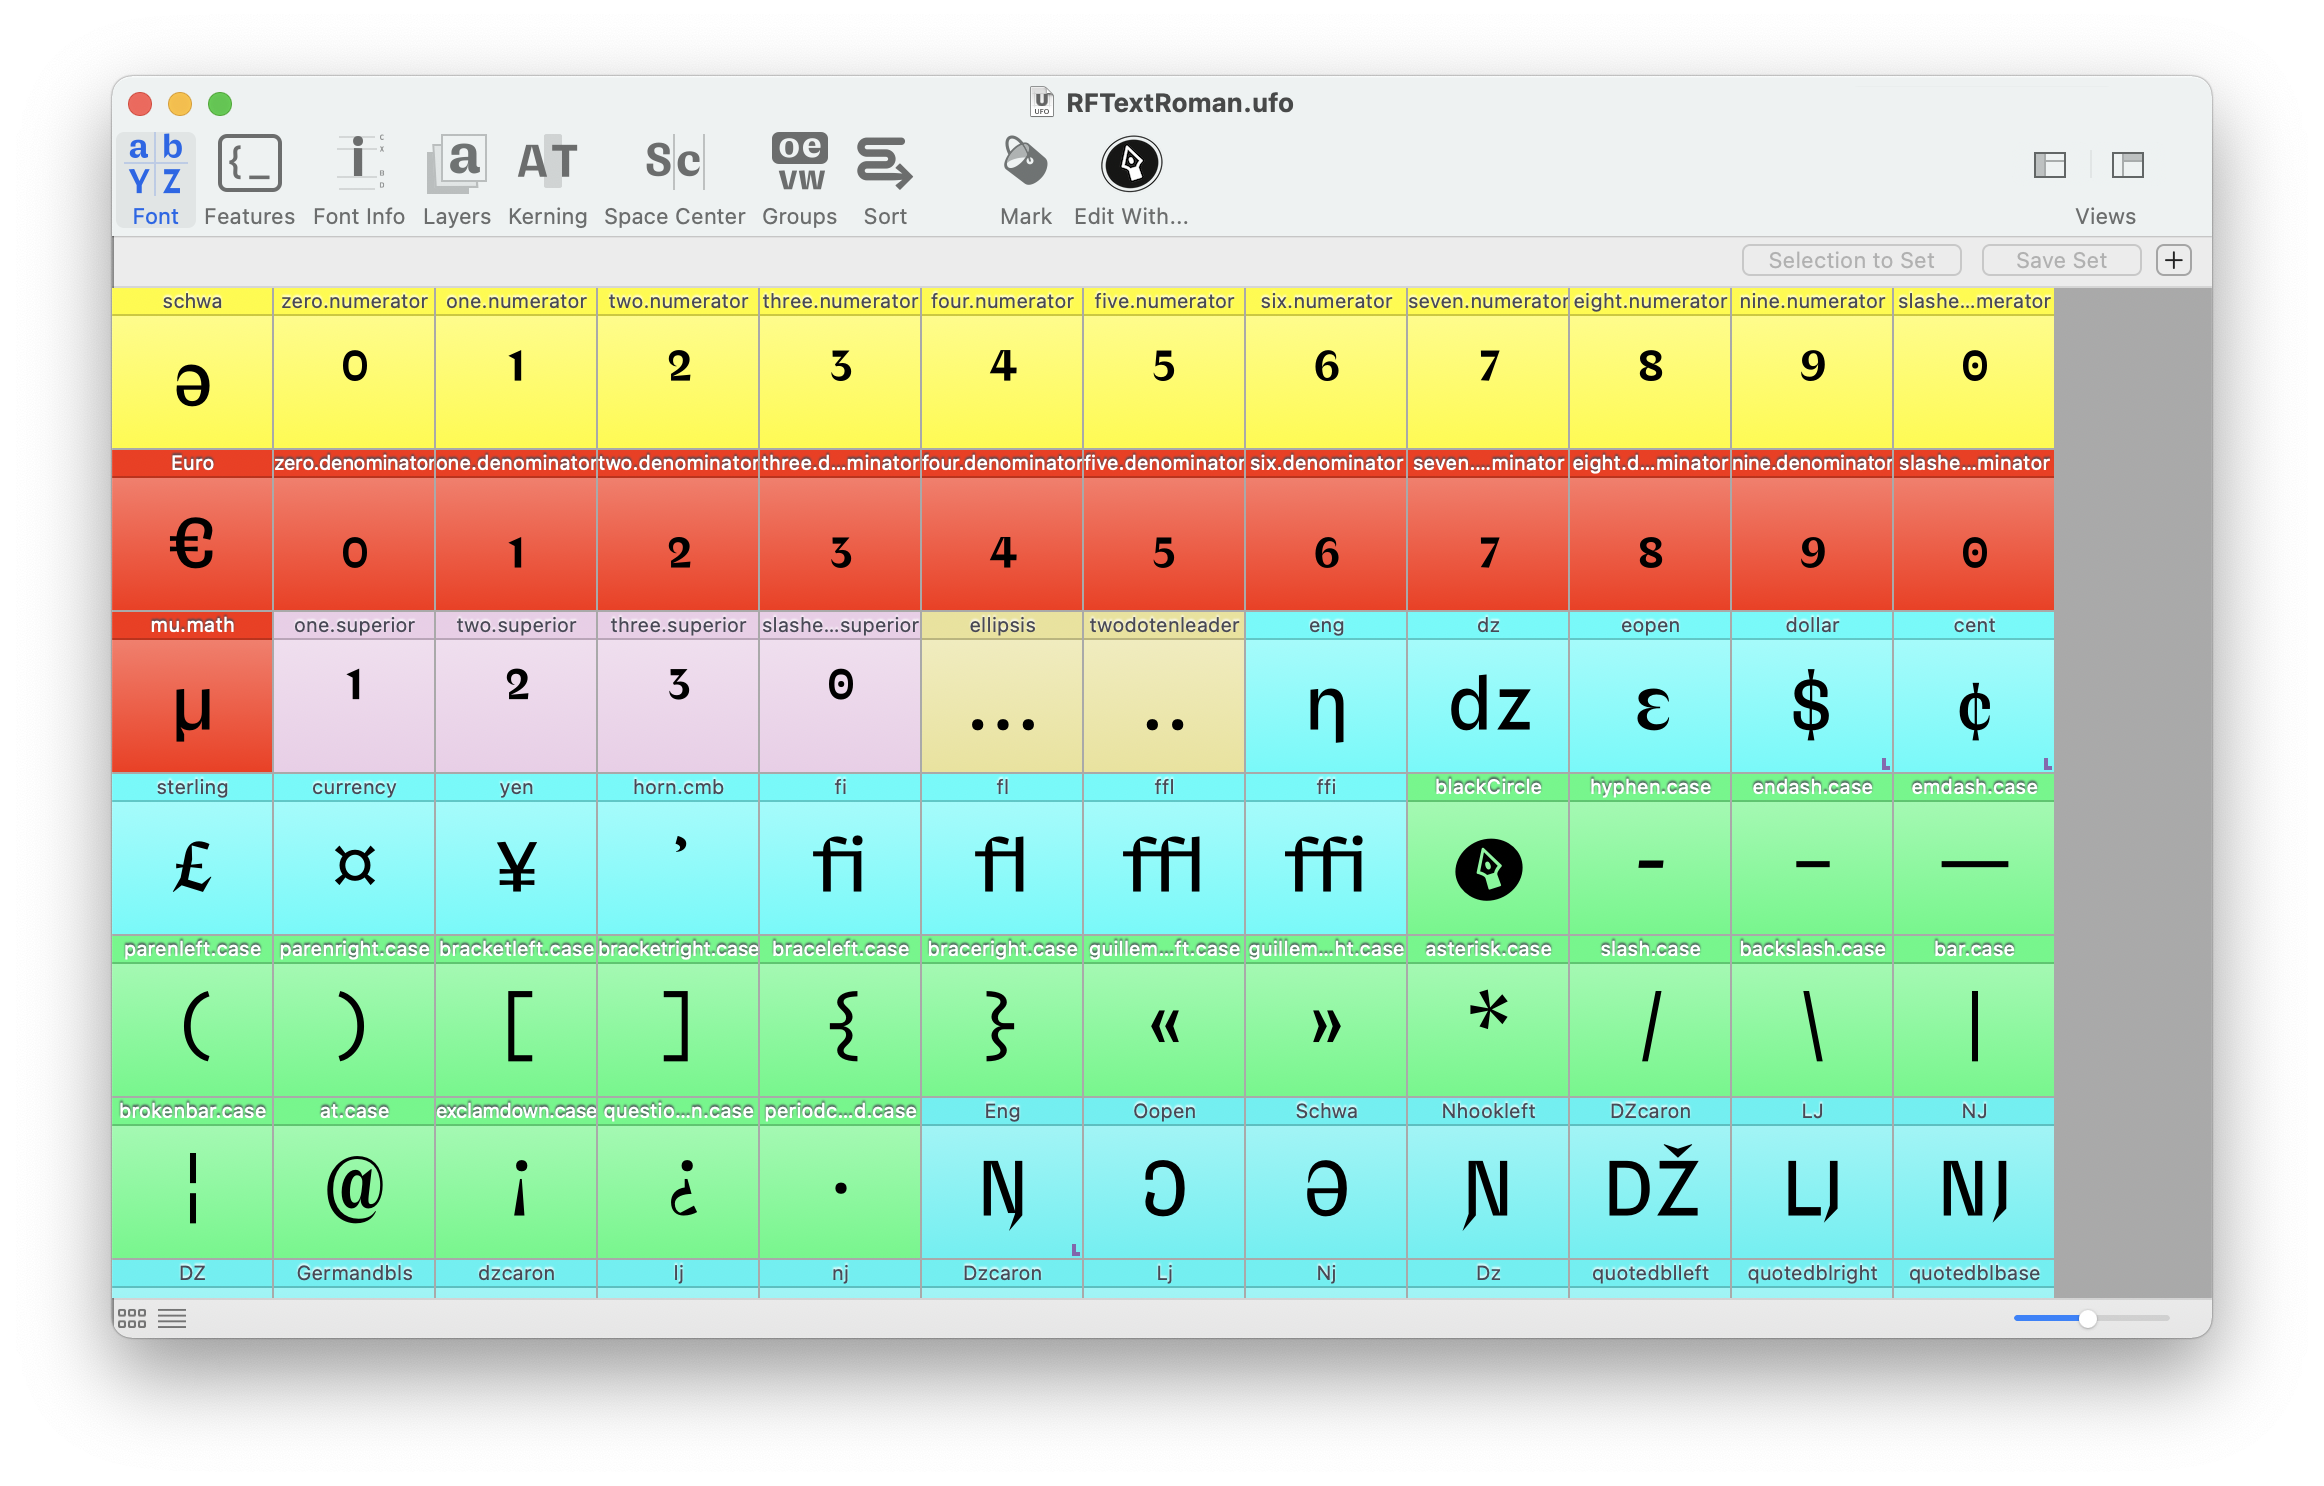
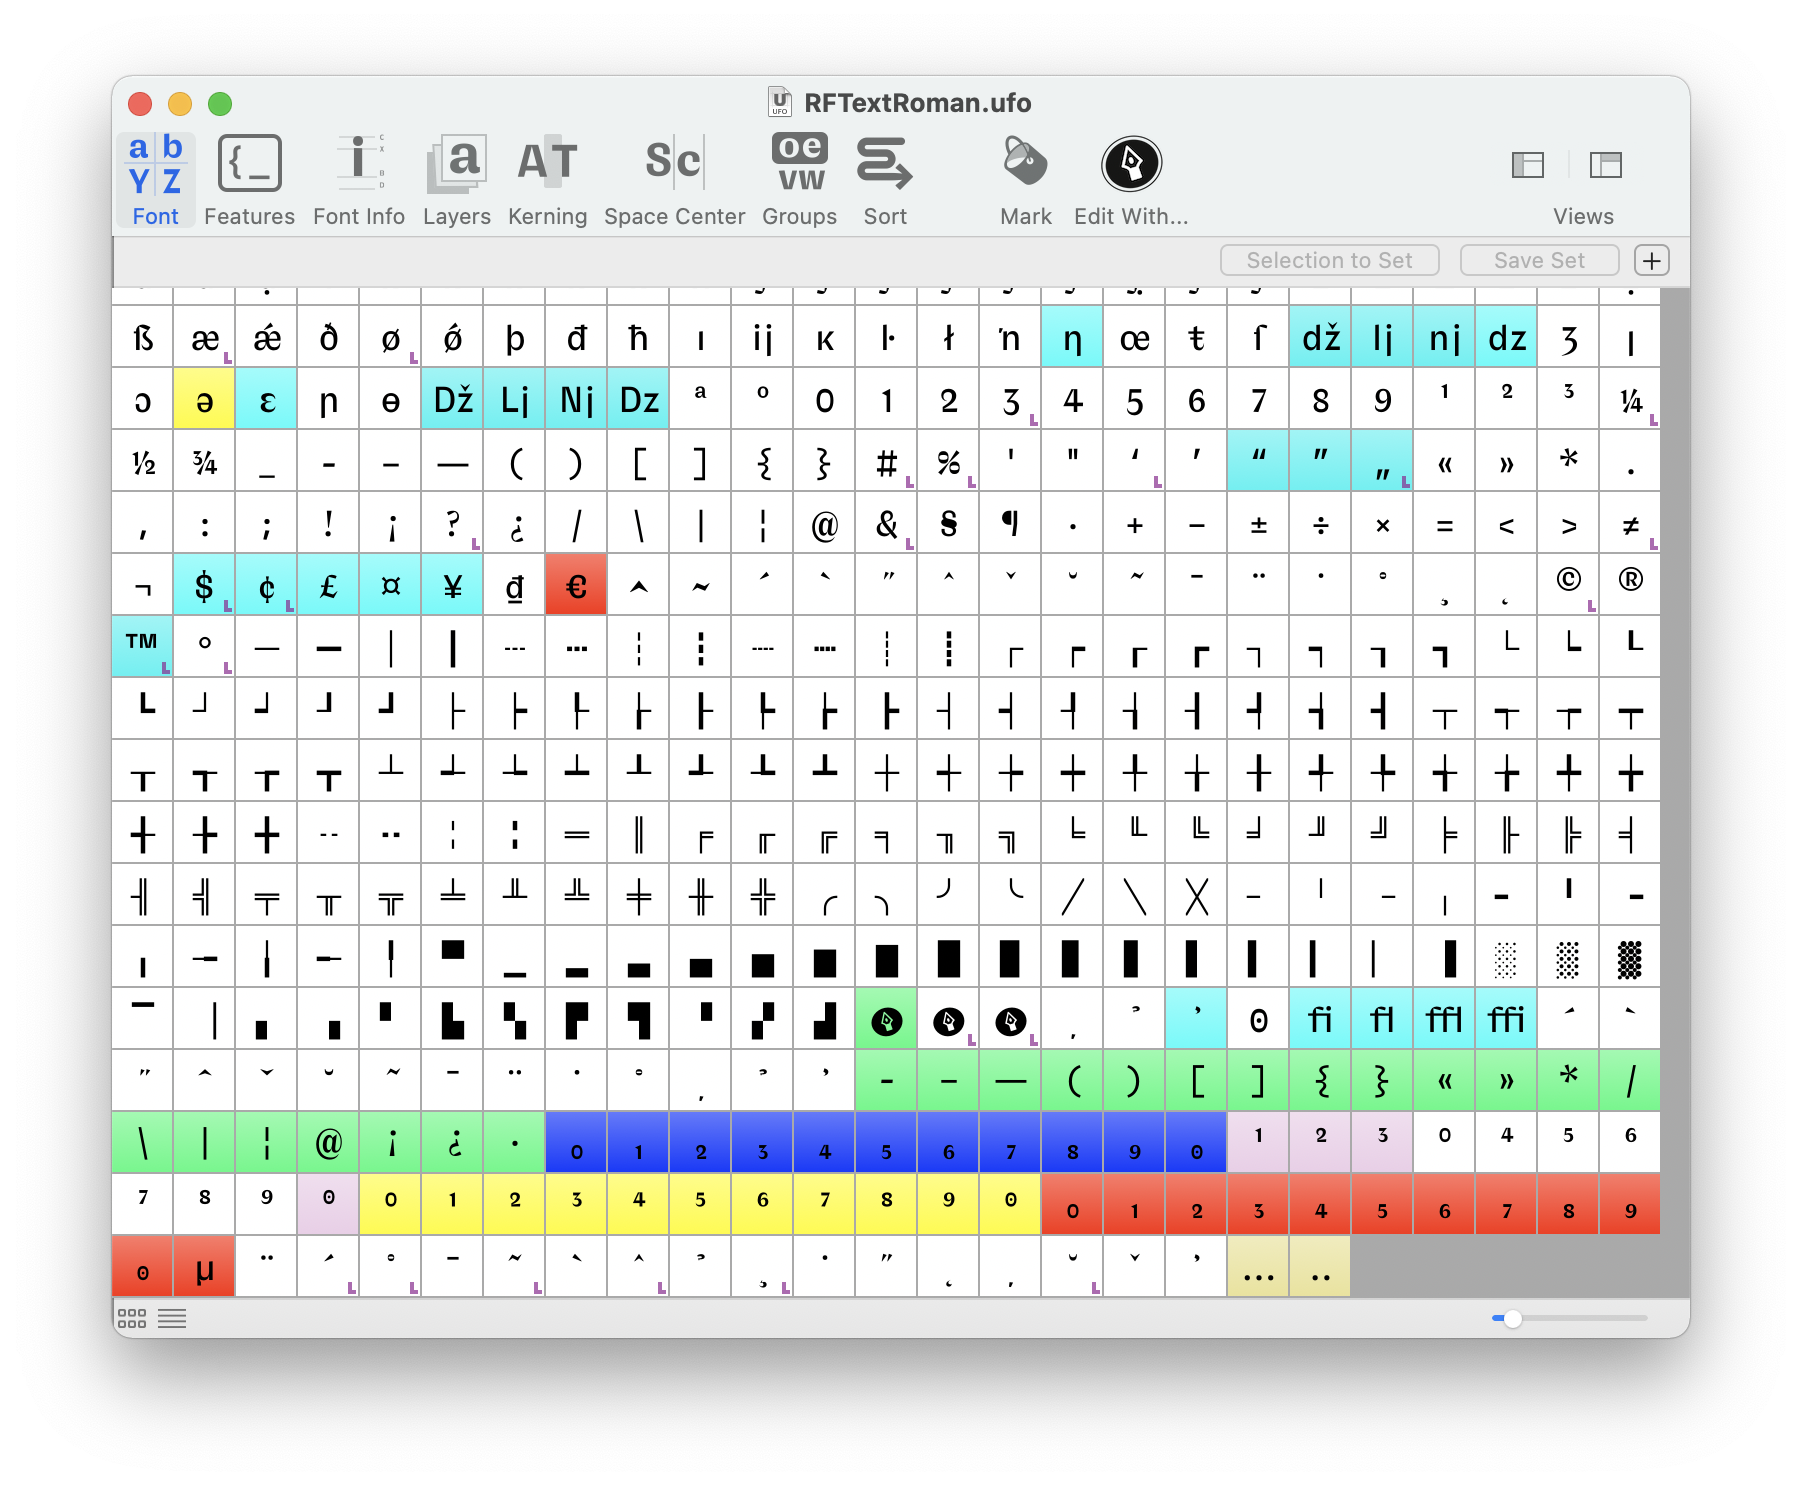
Each glyph in a UFO font can have a mark color attached to it. Mark colors are displayed in the Font Overview, and are useful for organising and classifying glyphs during production.
This page gives an overview of how to create and use mark colors in RoboFont.
Creating custom mark colors
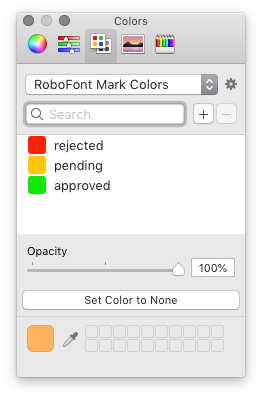
Custom mark colors can be created in the Mark Colors section of Preferences > Miscellaneous. Custom colors can have a name, so you can assign meanings to colors and create your own color coding schemes.
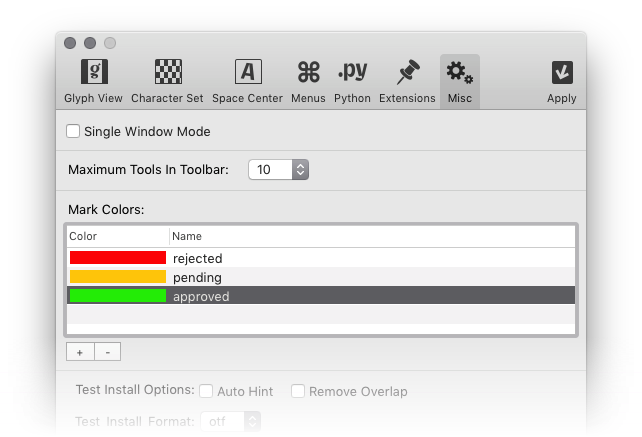
Custom colors are saved with the user preferences and are available for all fonts.
Applying mark colors
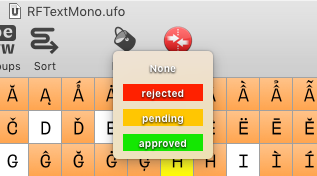
Custom mark colors can be applied to selected glyphs using the Mark button in the Font Overview. Clicking on the button will display a list of custom colors to choose from.
Mark colors can also be applied using the Mark button in the Inspector > Glyph. Clicking on the color swatch will open a Colors window with several options. The custom colors defined in the Preferences are available in the section Color Palette (third icon in the toolbar).
Searching for colors
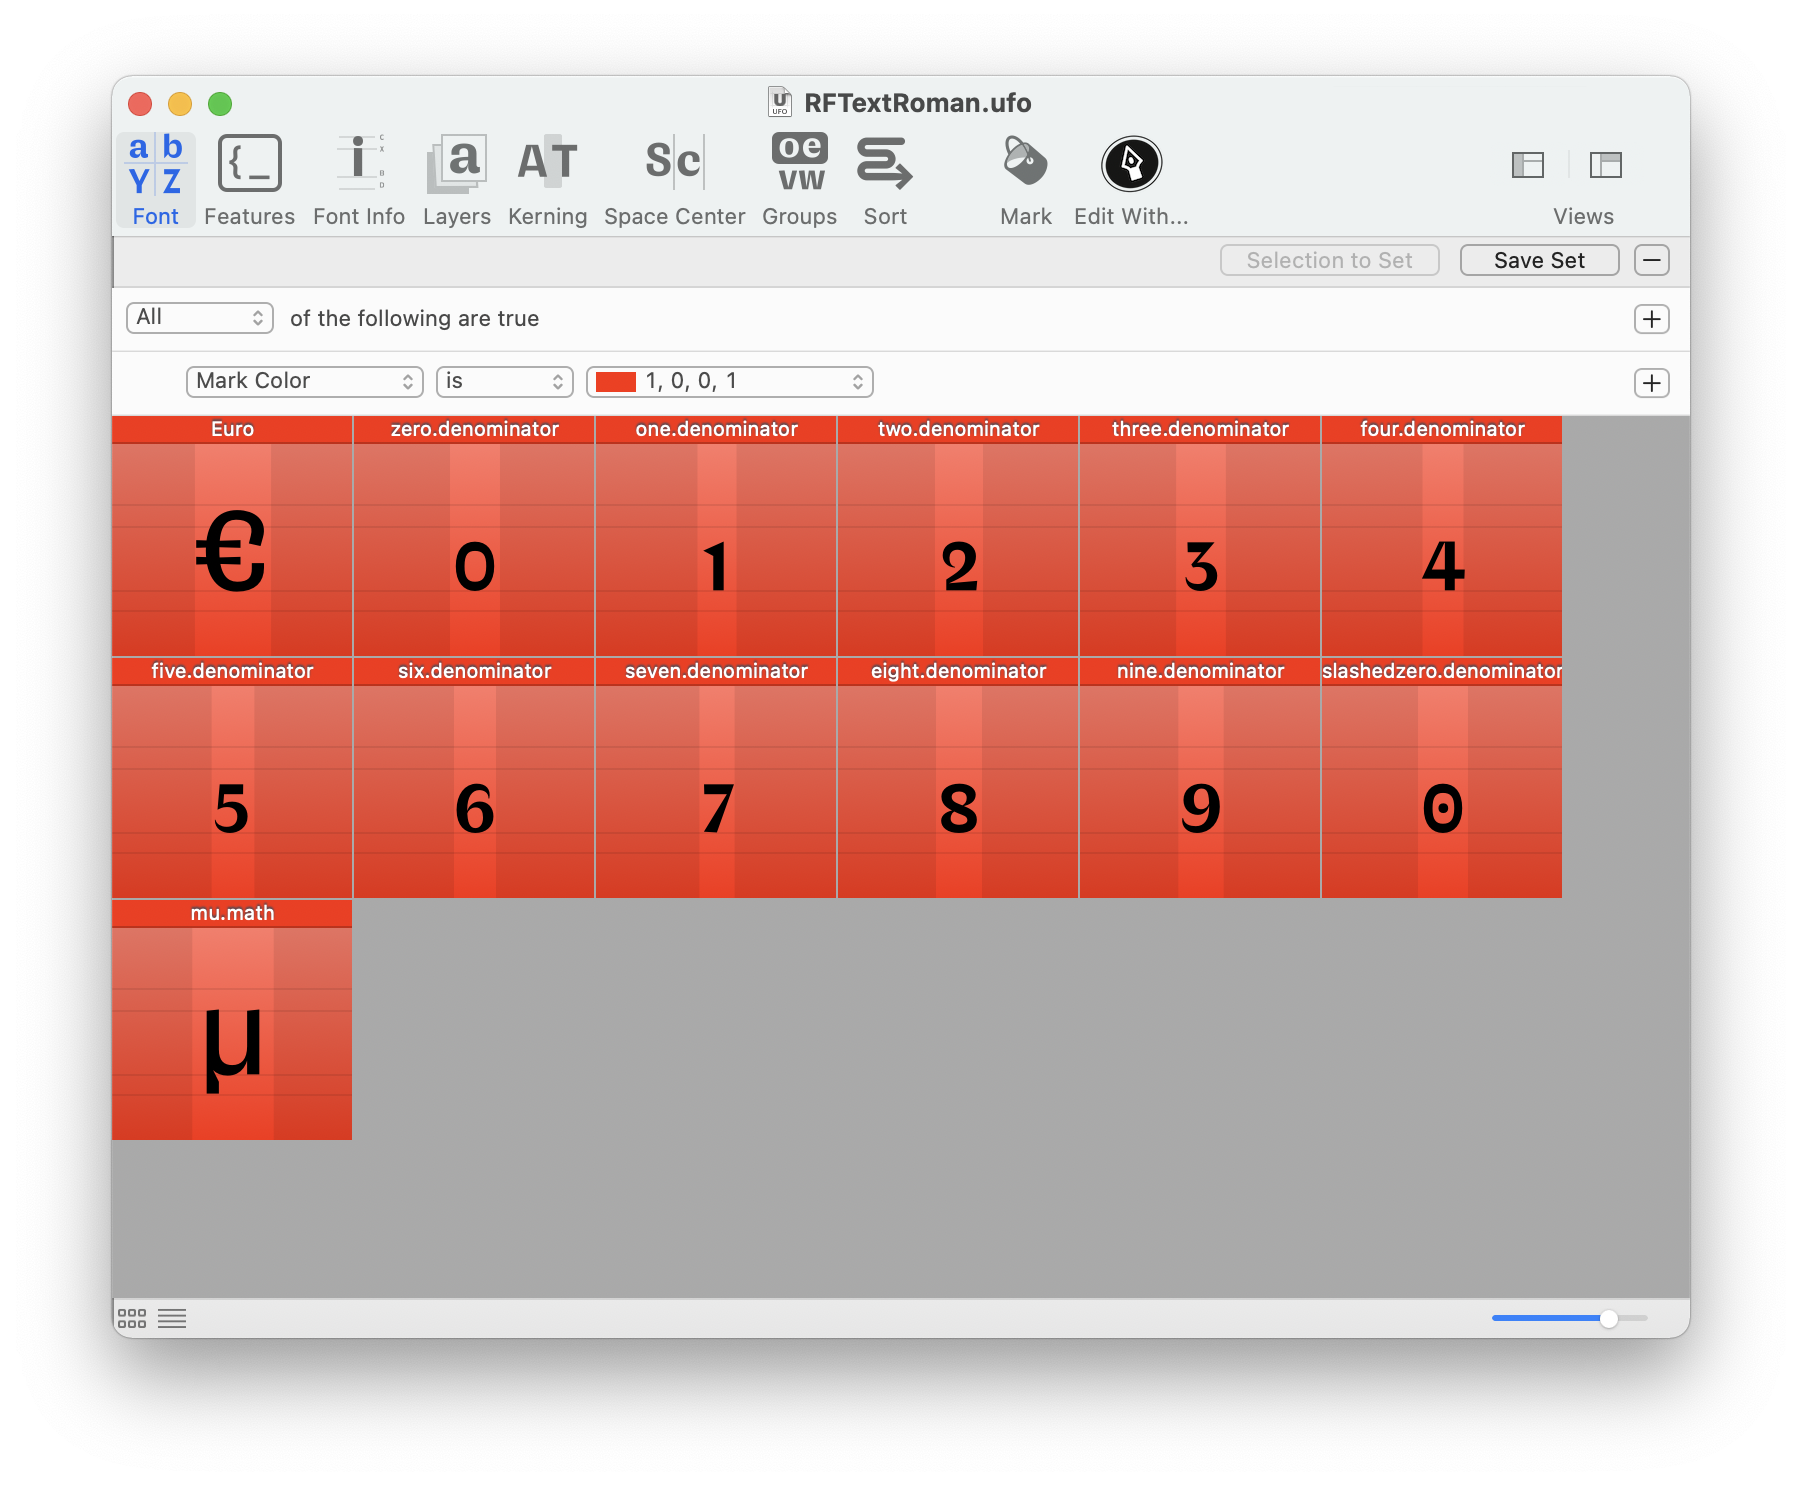
Mark colors make it easier to search for glyphs visually in the Font Overview. We can also perform search queries in the Search Glyphs panel using custom mark colors as parameters:
Sorting by colors
Colors can also be used for sorting the glyphs in the Font Overview. This can be done by switching to List Mode view and clicking on the Mark column header:

The new sorting order is maintained if you switch back to Tiles Mode: