Autohinting TrueType fonts with ttfautohint ↩
From the ttfautohint documentation:
ttfautohint is a library written in C that takes a TrueType font as the input, removes its bytecode instructions (if any), and returns a new font where all glyphs are bytecode hinted using the information given by FreeType’s auto-hinting module.
Using ttfautohint with Batch
The Batch extension makes it easy to generate TTF fonts and hint them with ttfautohint in RoboFont.
If you don’t have Batch installed yet, you can get it from Mechanic.
Follow the steps below to generate TrueType fonts and apply ttfautohint to them:
-
Open the Batch extension.
-
In the Fonts section, select one or more UFOs to generate TTFs from (drag the fonts from Finder into the list, or use the Open or Add Open Fonts buttons in the toolbar).
-
In the Web Fonts section, select Save TTF…
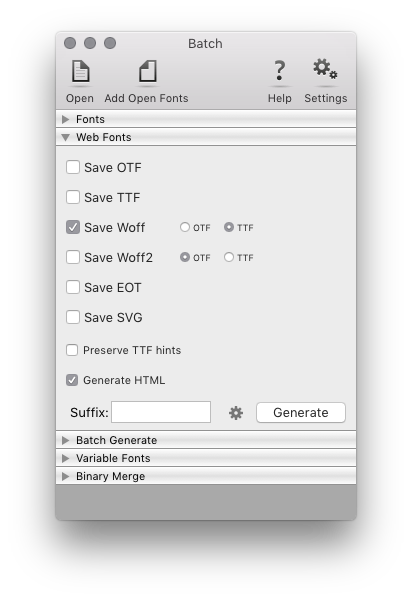
…then click on the gears icon to open a sheet with ttfautohint settings:
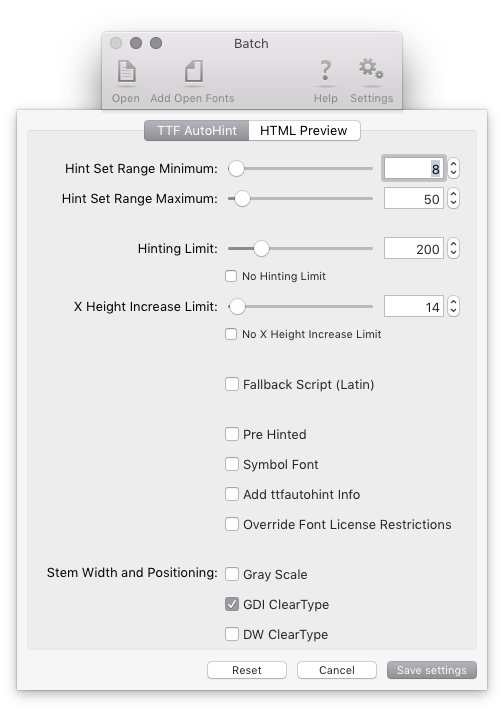
Adjust the settings as needed – see the ttfautohint documentation for details about each option.
-
Click on Save settings when done to close the sheet.
-
Click on the Generate button to generate the selected fonts in OpenType-TTF format (
.ttf) and autohint them using ttfautohint.
Using ttfautohint with a script
You can use ttfautohint through the mojo API. ttfautohint does not come shipped with RoboFont, so you need to install it separately. The easiest way to install ttfautohint is to use HomeBrew:
$ brew install ttfautohint
from mojo.compile import hasTTFAutoHint, ttfautohint

fileName = 'someFont'

if hasTTFAutoHint():
    ttfautohint(fontPath=f'{fileName}.ttf',
                outputPath=f'{fileName}_hinted.ttf')
Always check if ttfautohint is available on your machine, otherwise the application will crash. If you are running a script outside RoboFont, you can call ttfautohint – as any other command line tool – using the subprocess module.